SSAO
Intro
SSAO stands for Screen Space Ambient Occlusion, which is the screen space technique for rendering a kind of shadowing that occurs when objects in close proximity block ambient lighting near each other. It's something that I didn't notice I was really missing until I added it.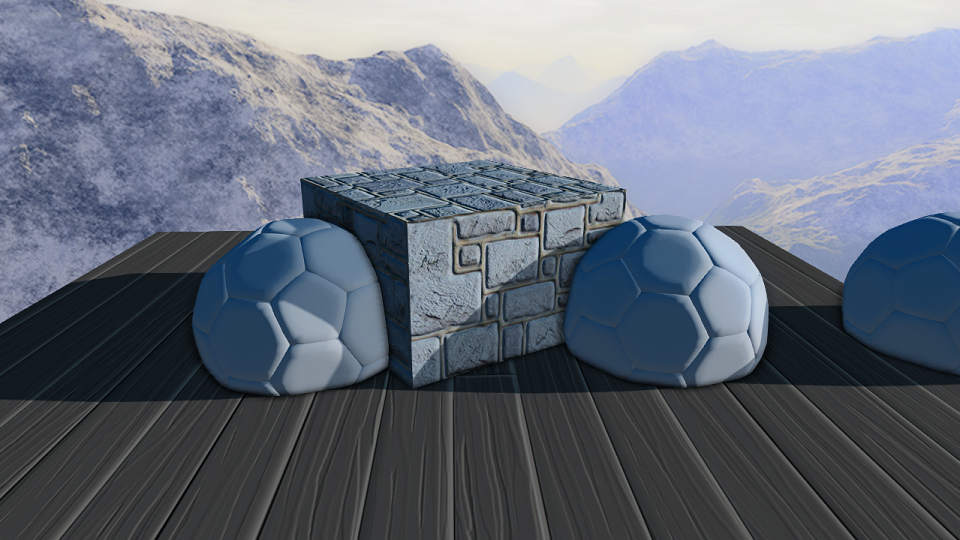
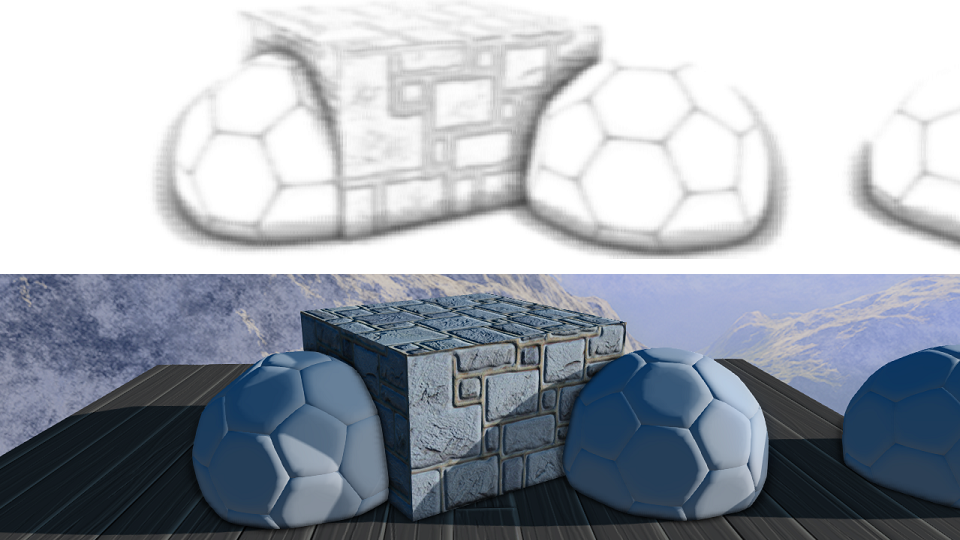
Above, you see SSAO enabled. It's perhaps a little stronger than I'd normally use, but it helps you see what we're going to achieve.

Looks a lot worse when it's not enabled, right? We're not just adding another dimension to our shadows, we're helping clearly identify objects near each other while simultaneously making object intersections look better by giving a pleasing transition between the two.
For this effect, we'll need our depth and normal textures from our g-buffer pass, and an additional "random vector" texture, which I'll explain in a bit. To quickly sum it up before diving in, we're basically going to be taking a number of randomized depth samples within the upper hemisphere of the normal of each given pixel. We then use those samples to calculate how shadowed each pixel should be, and we're done!
Generating Randomized Normal Texture
This part is pretty simple, though I don't take credit for the generation technique. See John Chapman's site (referenced below) to see the original, and big thanks to him for a solid post on SSAO. My overall implementation varies from his, but I found his post hugely helpful for getting there.
float noiseTextureFloats[192];
for(int i = 0; i < 64; i++)
{
  int index = i * 3;
  noiseTextureFloats[index] = MathHelper::RandRange(-1.0f, 1.0f);
  noiseTextureFloats[index+1] = MathHelper::RandRange(-1.0f, 1.0f);
  noiseTextureFloats[index+2] = 0.0f;
}
Here we're creating an 8x8 texture. Use whatever method you want for randomization as long as you end up with -1.0 to 1.0 ranges for the x and y
values, and use 0 for z. We're going to be using these values to rotate the samples we take (oriented along the z-axis, hence z = 0) to minimize
banding that would occur otherwise. To set up the texture, we do the following. Obviously, you'll need to tweak it based on how you access your
device and store your textures and resource views.
D3D11_SUBRESOURCE_DATA data;
data.pSysMem = noiseTextureFloats;
data.SysMemPitch = 8*12;
data.SysMemSlicePitch = 0;

D3D11_TEXTURE2D_DESC descTex;
descTex.Width = 8;
descTex.Height = 8;
descTex.MipLevels = descTex.ArraySize = 1;
descTex.Format = DXGI_FORMAT_R32G32B32_FLOAT;
descTex.SampleDesc.Count = 1;
descTex.SampleDesc.Quality = 0;
descTex.Usage = D3D11_USAGE_DEFAULT;
descTex.BindFlags = D3D11_BIND_SHADER_RESOURCE;
descTex.CPUAccessFlags = 0;
descTex.MiscFlags = 0;
mGraphicsManager->GetDevice()->CreateTexture2D(&descTex, &data, &mNoiseTexture);

D3D11_SHADER_RESOURCE_VIEW_DESC descSRV;
descSRV.Format = descTex.Format;
descSRV.ViewDimension = D3D11_SRV_DIMENSION_TEXTURE2D;
descSRV.Texture2D.MostDetailedMip = 0;
descSRV.Texture2D.MipLevels = 1;
mGraphicsManager->GetDevice()->CreateShaderResourceView(mNoiseTexture, &descSRV, &mNoiseResourceView);
You may have already done this before, but in case you haven't, we're just using the texture data we generated above to create a DirectX texture resource we can use in our shader. We'll use an 8x8 RGB32 texture (honestly it probably doesn't need that much precision, but whatever), and assign our float data to it. The 8*12 is because we have 8 pixels in each row (width = 8), and each pixel is RGB32, which is 4 bytes per element multiplied by 3 elements per pixel. You'll need a sampler to go along with this, so however you go about that, just make sure it's a point sampler that wraps, since this noise will be tiled across the screen.
Generating Sample Offsets
We use the following to generate our depth sampling offsets within our sampling hemisphere. The scaling is done so that our sampling offset distances are closer to the center, but move outward as we add samples according to the accelerated function we use. I'm supporting up to 16 samples, so I'm generating all possible samples just to have them.
for(int i = 0; i < 16; i++)
{
	int index = i * 3;
	mSSAOKernel[index] = MathHelper::RandRange(-1.0f, 1.0f);
	mSSAOKernel[index+1] = MathHelper::RandRange(-1.0f, 1.0f);
	mSSAOKernel[index+2] = MathHelper::RandRange(0.0f, 1.0f);

	float scale = (float)i / 16.0f;
	float scaleMul = MathHelper::Lerp(0.1f, 1.0f, scale * scale);

	mSSAOKernel[index] *= scaleMul;
	mSSAOKernel[index+1] *= scaleMul;
	mSSAOKernel[index+2] *= scaleMul;
}
SSAO Shader
Alright. Now that we have our noise texture, our randomized sample offsets, and we have our depth/normals from the gbuffer pass, we're ready to jump into the shader. The vertex shader is just a simple full screen triangle shader. If you have another method you use for full-screen effects, just use that as long as you can get the same positions/texcoords.
struct VS_to_PS
{
    float4 positionViewport : SV_Position;
    float4 positionClip     : positionClip;
    float2 texCoord         : texCoord;
};

VS_to_PS SSAOVertexShader(uint vertexID : SV_VertexID)
{
    VS_to_PS output;

    output.texCoord = float2((vertexID << 1) & 2, vertexID & 2);
    output.positionClip = float4(output.texCoord * float2(2.0f, -2.0f) + float2(-1.0f, 1.0f), 0.0f, 1.0f);
    output.positionViewport = output.positionClip;

    return output;
}
Now for the pixel shader. We start below by getting the depth at the current pixel location, and use it to find the view space position. Use whatever method you typically use to reconstruct your depth, I include the source for this shader below and that has the functions I use. Then on the third line I reconstruct the normal from my gbuffer's normal texture. I use sphere map encoding which packs it into the xy coordinates, so I use the .xy to unpack it. You don't have to use my methods, the important part is to have your view space position and normal.
float4 SSAOPixelShader (VS_to_PS input): SV_Target
{
	float centerZBuffer = DepthTexture.Sample(ClampSampler, input.texCoord).r;
	float3 centerDepthPos = ComputePositionViewFromZ(uint2(input.positionViewport.xy), centerZBuffer);
	float3 normal = DecodeSphereMap(NormalsTexture.Sample(ClampSampler, input.texCoord).xy);
Next, we get the randomized vector from the texture we generated earlier. We multiply the texcoord by noiseScale, which (with our 8x8 texture) is screenWidth/8, screenHeight/8, so it tiles across the screen. The next lines build us a matrix that we can use to orient our randomized depth samples along the normal (with the noise vector incorporated). This makes sure that our sampling hemisphere is correctly aligned when we take the samples.
float3 randomVector = RandomTexture.Sample(WrapSampler, input.texCoord * noiseScale).xyz;
float3 tangent = normalize(randomVector - normal * dot(randomVector, normal));
float3 bitangent = cross(normal, tangent);
float3x3 transformMat = float3x3(tangent, bitangent, normal);
Next is where we accumulate occlusion, and is where I take a bit of a hybrid of a couple techniques I've seen for SSAO. For each sample, we start by transforming the offset by our recently calculated alignment matrix. We then project that position farther out based on the radius we want, and move it towards the correct position by adding it to our initial position. Then we get the direction between our sample and center position, and use it to find the dot between itself and our original normal (nDotS), ignoring anything in the negative side by maxing it to 0, and apply it as a multiplier to the final occlusion addition at the end. We're doing this because we want samples to matter less if they deviate widely from the initial normal, which makes for tighter, better looking AO (big thanks to Christoph for this idea, also linked below). We then get our offset sample in screen space, and find its position based on depth like we did for the original depth sample. Then we do a range check on how much of the AO we incorporate based on distance and keep it within 0 and 1 (the smoothstep line), making samples matter more the closer they are to the original depth within our radius. And then again we add another check to make sure our sample depth is not behind the sample position because we don't want those to contribute. At the end of this loop, we've accumulated all our occlusion for this pixel.
float occlusion = 0.0;
for (int i = 0; i < (int)kernelSize; ++i)
{
	float3 samplePos = mul(kernelOffsets[i], transformMat);
	samplePos = samplePos * radius + centerDepthPos;

	float3 sampleDir = normalize(samplePos - centerDepthPos);

	float nDotS = max(dot(normal, sampleDir), 0);

	float4 offset = mul(float4(samplePos, 1.0), cameraProjMatrix);
	offset.xy /= offset.w;

	float sampleDepth = DepthTexture.Sample(ClampSampler, float2(offset.x * 0.5 + 0.5, -offset.y * 0.5 + 0.5)).r;
	sampleDepth = ComputePositionViewFromZ(offset.xy, sampleDepth).z;

	float rangeCheck = smoothstep(0.0, 1.0, radius / abs(centerDepthPos.z - sampleDepth));
	occlusion += rangeCheck * step(sampleDepth, samplePos.z) * nDotS;
}
Now we just divide the occlusion by our sample size to get the average, and invert it so we can multiply it in our lighting pass as-is, since we want more occlusion to mean darker. Then we take it to the given power to loosen or tighten the shadowing area, and we're done! You don't actually need a full RGB texture to store it, as you can see, but it's just easier to display it as a greyscale texture to see what's going on.
occlusion = 1.0 - (occlusion / kernelSize);
float finalOcclusion = pow(occlusion, power);
return float4(finalOcclusion, finalOcclusion, finalOcclusion, 1.0);
The resulting texture looks something like this:
Blur SSAO Texture
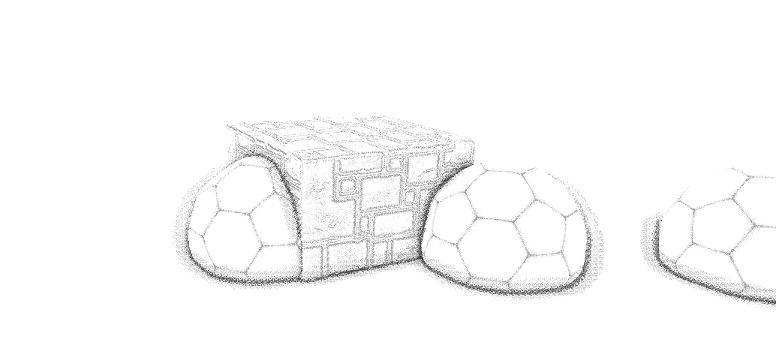
Now the above shows what we've been trying to achieve. Again, it's a bit stronger than I'd personally want to use, but for the purpose of demonstration it's helpful to see. You can play around with the strength and the tightness of the shadowing to get it to where you want it. What you've no-doubt noticed is that the repetitive noise is visible. We can clear that up quite easily by blurring it. It won't be 100% unnoticeable, but certainly good enough for this implementation. I use a Gaussian blur with a blur radius multiplier the same as my SSAO radius, but you can use whatever you want. I won't go over blurring here because there are plenty of great resources out there for how to do it, and I also have the implementation in my Cascaded Shadow Maps tutorial, though I've since switched it to use a full-screen triangle rather than a quad. Once you've got it blurred, it looks much better: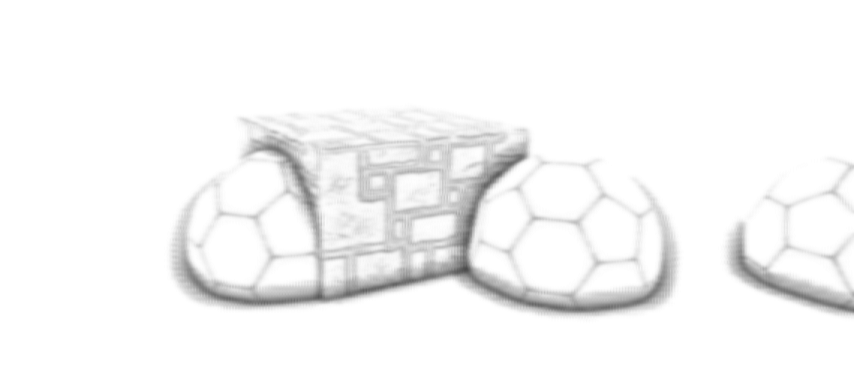
And then once applied to your scene, you have some good looking ambient occlusion!
HBAO+
Naturally, you won't ever be wholly satisfied with standard SSAO, because it's very hard to tune to look good in a variety of scenes and different lighting situations. It may appear in places you don't want, but then disappear in places you want it after you change your variables. Nvidia and AMD have released HBAO/HDAO, respectively, but their performance cost was not good enough for the quality boost. Then, in comes HBAO+ from Nvidia, specifically Louis Bavoil. Not only is the solution compatible with both Nvidia and AMD devices (unlike HBAO/HDAO), but it looks more natural AND it performs better than standard SSAO. You need to be running on a DX11 card for it to work because it uses a sampling technique only exposed to those cards. HBAO+ is really following suit with how a lot of postfx seem to be going, and that's, quite simply, finding ways to take a butt-load of samples without killing your framerate. You can dig into the implementation here. Adding this particular piece of software to my engine has literally been the simplest process I've had with 3rd party code. You just plug it in and you're good to go, and it's especially easy if you already have SSAO set up, because you can simply swap it out. It's worth doing SSAO yourself to understand the concept, but at the end of the day it currently doesn't get any better than HBAO+, both in look and performance.
Here you see the same scene rendered with HBAO+. Notice the softer falloff, it looks so much more natural. And you get a little performance kick too, which is great!
Resources
Below are the resources I found particularly useful.http://blog.evoserv.at/index.php/2012/12/hemispherical-screen-space-ambient-occlusion-ssao-for-deferred-renderers-using-openglglsl/
http://john-chapman-graphics.blogspot.co.uk/2013/01/ssao-tutorial.html
And finally, the shader source file. I don't claim anything to be perfectly optimized, but hopefully it helps you out!